CS 419H -- Fall Quarter 2006
Project #3: Oregon Terrain Visualization
60 Points
Due: Monday, October 16
This page was last updated: October 9, 2006
Requirements:
Using OpenDX:
-
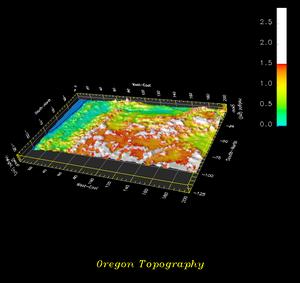
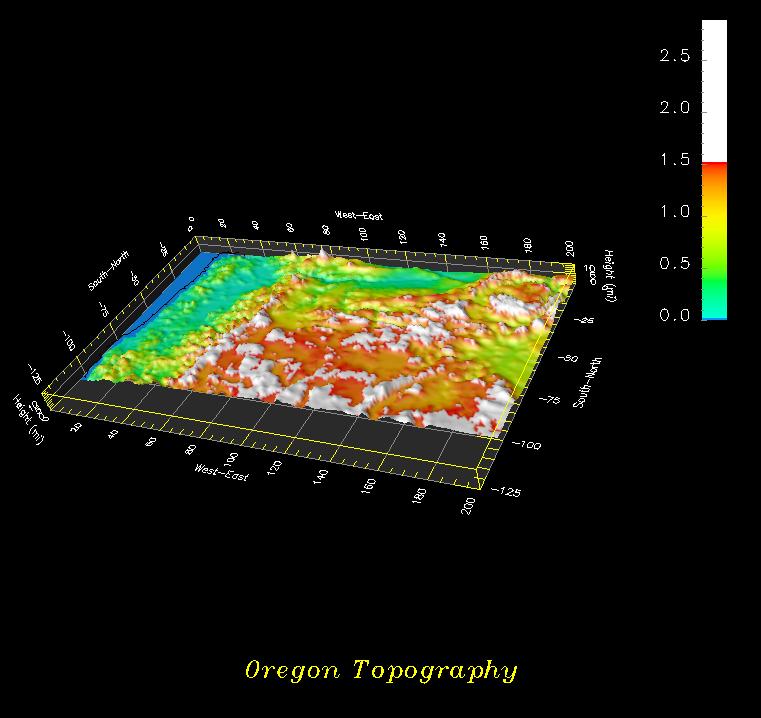
Import the Oregon terrain height field data.
Put the file
or.general
and the file
or.dat
in the same directory.
For some reason, or.general wouldn't download with the Internet Explorer browser,
but did fine with the Mozilla Firefox browser. :-(
-
Edit or.general to have the proper path to get to or.dat.
One way to edit a file on Windows is to run:
Start -> All Programs -> Accessories -> WordPad.
Then click on File-Open and navigate to your or.general file.
The file editing in WordPad is very much like a word processor.
Be sure to Save when you are done.
-
First, design a simple network to visualize this data and be sure it is correct.
Then, incrementally embellish it.
-
Read or.general into the Import module.
-
RubberSheet the data to give it a 3D look.
-
Use Perspective projection, not Orthographic.
(Image window -> Options -> View Control)
- Connect a Scalar interactor into the second input on RubberSheet.
This is a height exagerration. (1. to 10. are a good range.)
-
Use Colormap to create the color range.
Assuming the snowline is at 1.5 miles, create a color map that
shows the different heights and also makes it obvious what elevations
are above the snowline.
-
Create a black contour line at a height of 0.
This will show the coastine.
Don't put an interactor on this value.
-
Create a Colorbar showing elevations and their colors.
It must have the same color scheme as does the terrain.
-
Create a caption.
Use a different font than the default one.
(Hint: Description, Expand.)
Make the caption yellow.
(Hint: same way you make the contour black.)
-
Create a new PowerPoint presentation file:
- Put your name, course, and project number (and any other decoration you want) on the first slide.
- Put a picture of your network on the second slide.
- Put a picture of the image window on the third slide.
-
Rename your .ppt file to be some form of your last name or login.
For example, Joe Graphics might name his "jgraphics03.ppt".
Upload your .ppt file to Project03 in the
Teach area.
If this doesn't work, just email me your .ppt file as an attachment.
5 Points Extra Credit
Do something interesting with the AutoAxes.
(Image window -> Options -> AutoAxes...)
Grading:
| Item | Points |
| Looks like a perspective Oregon | 20 |
| Correct colorbar | 10 |
| Correct contour | 20 |
| Correct rubbersheet | 20 |
| Correct colormap | 20 |
| Correct caption | 10 |
| AutoAxes Extra Credit | 5 |
| Potential Total | 105 |