
This page was last updated: February 11, 2013
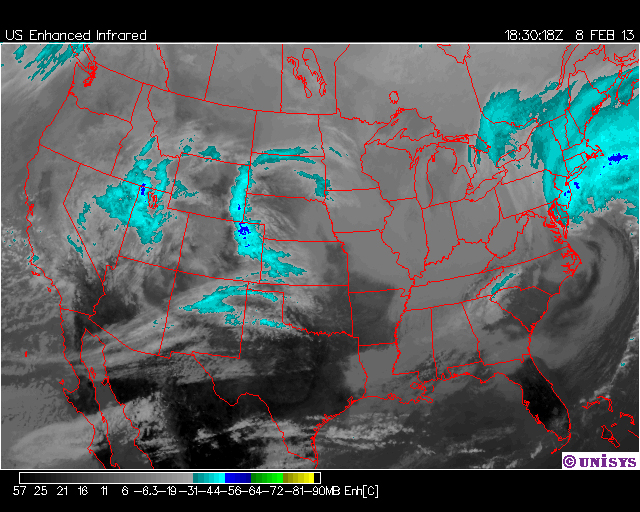
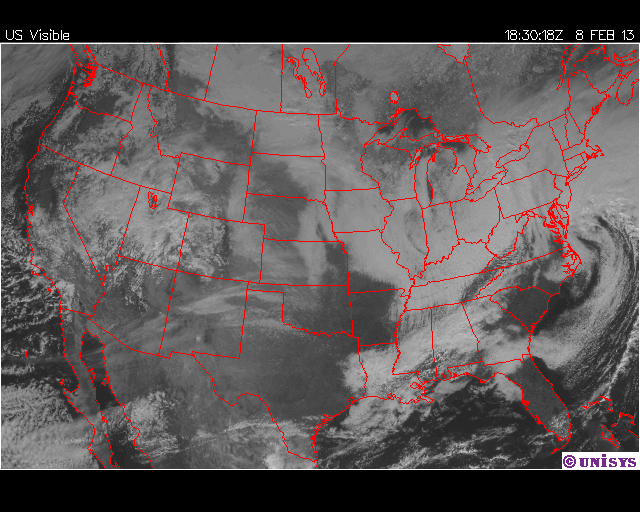
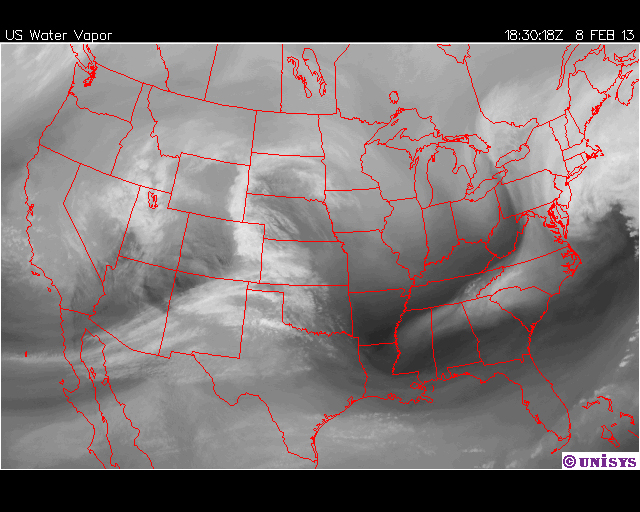
The three input images are:
| 
| 
|
| Enhanced Infrared (EIR) | Visible | Water Vapor |
| sat_ir_enh_us.bmp | sat_vis_us.bmp | sat_wv_us.bmp |
| 0.-1. | Blend EIR and Visible |
| 1.-2. | Blend Visible and Water vapor |
| 2.-3. | Blend Water vapor and EIR |
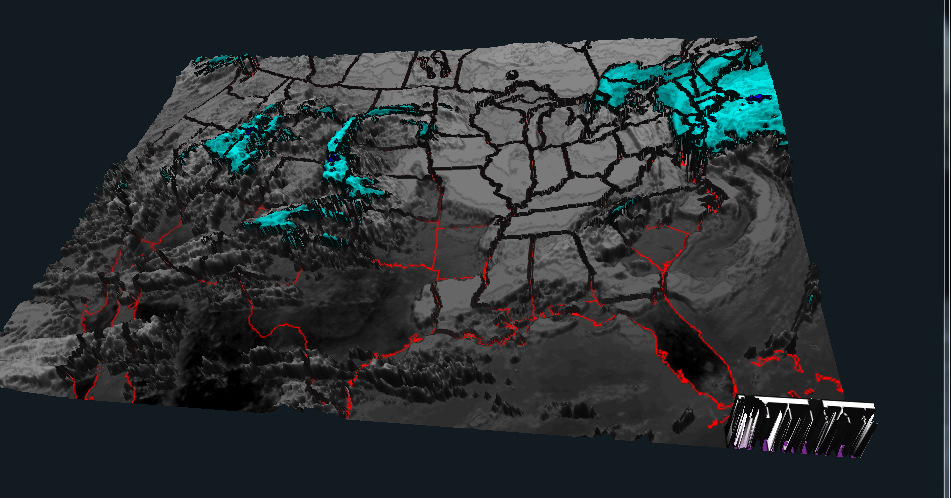
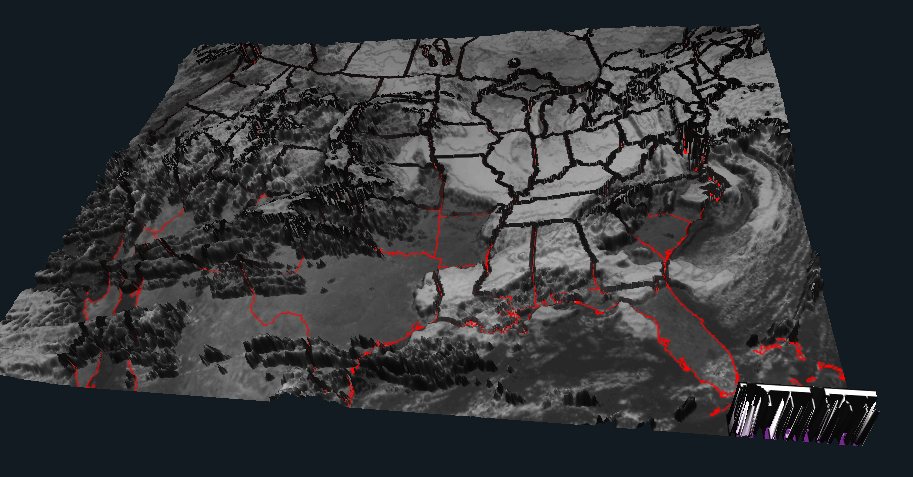
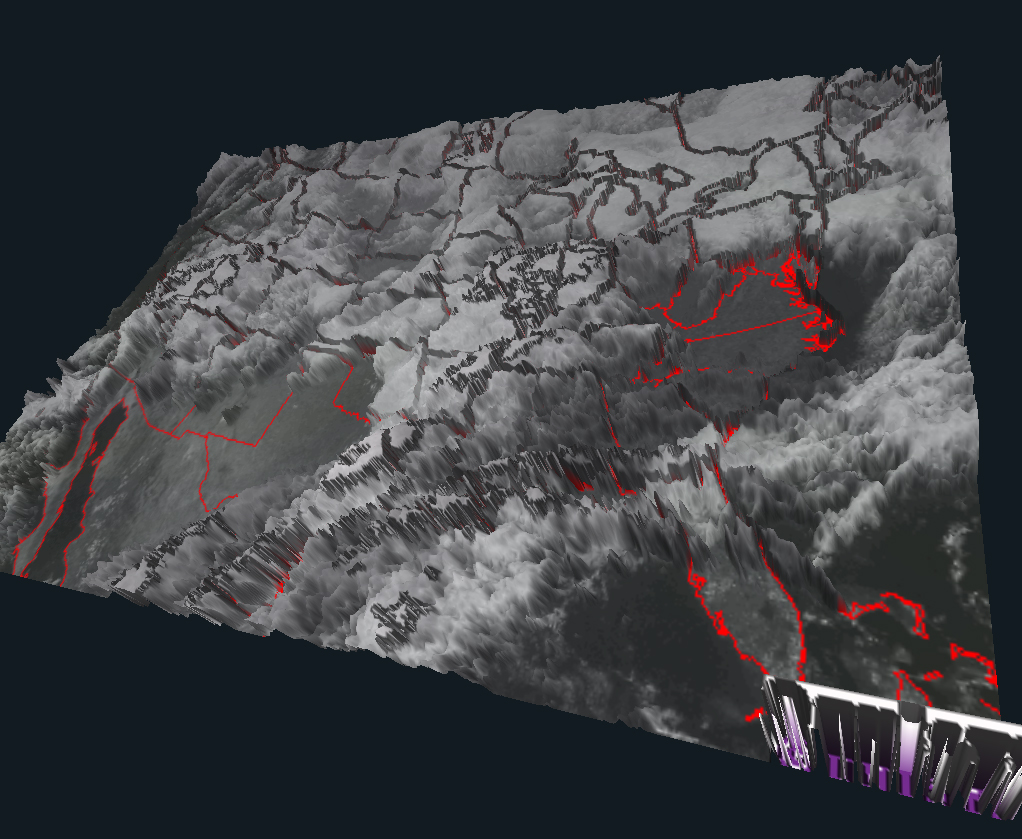
So far, we have only used texture-sampling from fragment shaders. But, in fact, texture-sampling is enabled in all shader types. Textures are often used from vertex shaders to tell you how much to displace vertices. We will do that here with the EIR image to render the cloud tops. In addition, you will use all three textures to render the colors on the cloud tops.
Use a glib file that looks something like this:
##OpenGL GLIB
Perspective 70
LookAt 0 0 3  0 0 0  0 1 0

Texture2D 6 sat_ir_enh_us.bmp
Texture2D 7 sat_wv_us.bmp
Texture2D 8 sat_vis_us.bmp

Vertex   clouds.vert
Fragment clouds.frag
Program  Clouds                                         \
                uScale <0. ????? ?????>                 \
                uBlend <0. 0. 3.>                       \
                IRUnit  6                               \
                WVUnit  7                               \
                VisUnit 8

Translate 0 -.1 0
Scale 1.25 1. 1.		# because these images are 640x512
QuadXZ 0. 1. ???? ????		# you decide how to tessellate

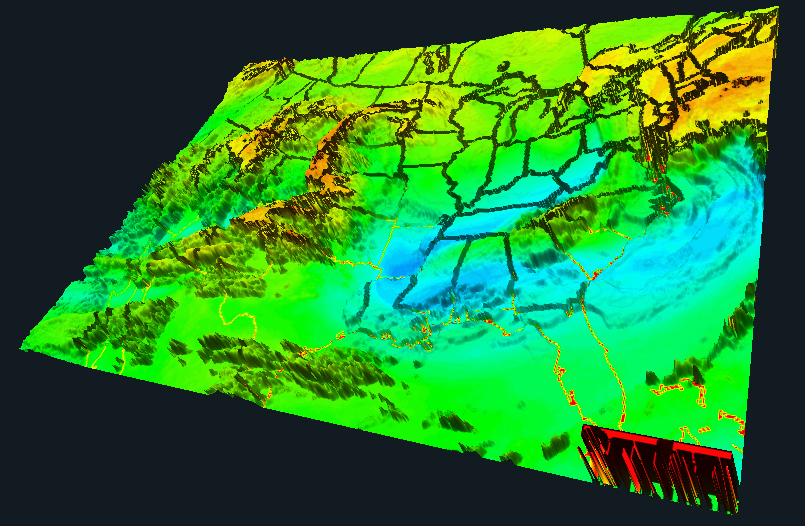
You will need to identify where the map is gray, where it is cyan, and where it is blue:
bool
IsGreen( vec3 color )
{
        ?????
}

bool
IsBlue( vec3 color )
{
        ?????
}

bool
IsCyan( vec3 color )
{
        ?????
}

bool
IsGray( vec3 color )
{
        ?????
}
Do not test against, for example, color.r == 0. The texture sampling process often blends colors from the texture. Instead, test against "SMALL" (and you get to decide what SMALL is).
Once you have identified what a general color is, you can turn it into a temparature by interpolating inside the above color scale:
        float temp = 15.;

        if( IsGray(htColor) )
        {
                temp = 51. - 137.5 * htColor.g;
        }
        else if( IsCyan(htColor) )
        {
                temp = -16. - 30. * htColor.g;
        }
        else if( IsBlue(htColor) )
        {
                temp = -79. + 30. * htColor.b;
        }
	else if( IsGreen(htColor) )
	{
		temp = -44.12 - 34.88 * htColor.g;
	}
In the troposphere, temperature is linearly related to atmospheric height by the equation:
float temp = 15. - 6.5*ht;where temp is in degrees Celsius and ht is in kilometers.
Inverting this gives us height as a function of temperature:
float ht = ( 15. - temp ) / 6.5;
When you use this, be sure that the height is restricted to being >= 0.
But, over time, various graphics cards have quietly eased the power-of-two restriction. The ones in the CGEL work this way. Yours may not. Let me know if there is a problem, and I can pad the images to 1024x512.
const float SLEFT   = 0.010;
const float SRIGHT  = 1. - SLEFT;
const float TBOTTOM = 0.090;
const float TTOP    = 1. - TBOTTOM;
vec3
BlueGreenRed( float f )
{
        f = clamp( 1.-f, 0., 1. );
	f = f * (2./3.);	// convert 0.-1. into 0.-(2/3)

        float r = 1.;
        float g = 0.0;
        float b = 1.  -  6. * ( f - (5./6.) );

        if( f <= (5./6.) )
        {
                r = 6. * ( f - (4./6.) );
                g = 0.;
                b = 1.;
        }

        if( f <= (4./6.) )
        {
                r = 0.;
                g = 1.  -  6. * ( f - (3./6.) );
                b = 1.;
        }

        if( f <= (3./6.) )
        {
                r = 0.;
                g = 1.;
                b = 6. * ( f - (2./6.) );
        }

        if( f <= (2./6.) )
        {
                r = 1.  -  6. * ( f - (1./6.) );
                g = 1.;
                b = 0.;
        }

        if( f <= (1./6.) )
        {
                r = 1.;
                g = 6. * f;
        }

        return vec3( r, g, b );
}
+5 points
Make the cloud height surface look more 3D-ish by adding lighting. You will need to compute a normal at each vertex, compute a lighting intensity there, and then pass it through the rasterizer into the fragment shader to modify the color. Use the terrain.frag shader as a starting point for computing the normals.
vec3 color = ...

gl_FragColor = vec4( vLightIntensity*color, 1. );
Add a slider-controlled "fudge-factor" that scales the heights used for the normal calculations without scaling the heights used for geometry display.
Be sure that your PDF file is turned-in separately (not part of a .zip file) and that it is named some unique variation of your name or login.
The weather is constantly changing.
Feel free to grab your own images from a different time.
You can get the current images
here.
The small purple text at the top will take you to the different images.
Convert each image from an 8-bit GIF to a 24-bit (RGB) BMP.
| Feature | Points |
|---|---|
| Cloud height displacement | 40 |
| Able to scale cloud height displacement | 15 |
| Map EIR image to the cloud tops | 15 |
| Map Visible image to the cloud tops | 15 |
| Map Water Vapor image to the cloud tops | 15 |
| Extra Credit | 5 |
| Potential Total | 105 |